Day 15 - Almost Ready for Priming


The picture shows the chrome edging I'm using (instead of T-molding and marquee retainer clips) to surround the control panel (both edges) and marquee.
If you look at the piece of wood just below the control panel with the two horizontal chrome strips, I'm not 100% on whether I should get rid of the bottom one or not.
the problem is (from the picture anyway) it just looks too small. There's a picture below of the almost finished cabinet showing it without.
 I also bought the primer for the MDF (it's from 'Tor' paints who supposedly make excellent speciality paints for covering damp (Zinnser brand, etc) and other surfaces. Tbh, the bloke in the factory shop said their standard acrylic primer would do the same job. But I figured it's the same price (£12 for 1 litre) and it's a primer and undercoat.
My T-Molding and router bit were shipped and picked up on Friday 11th and as of 12th had a status of 'Electronic Shipping Info Received' since then (15th). Hopefully it's just the US Postal Service is crap and it isn't lost.
In hind-sight I would change a couple of things with the cabinet:
1. Extrude the marquee by a couple of inches to allow more room for the speakers. the wood looks big enough but the way I've fitted it means it's a tight squeeze - the bottom wood for the marquee goes all the way to the edge rather than stopping where the speaker enclosure starts. This is to avoid the problem of light spillage from the light down through the speakers.
2. I would shorten the height of the kick-plate (the bit where you stand where the coin-slot/drawer is) and increase the height of the control panel to give more space for a bit of art.
3. Move the drawer up (see below)
4. Possibly make the marquee taller by a centimetre or two.
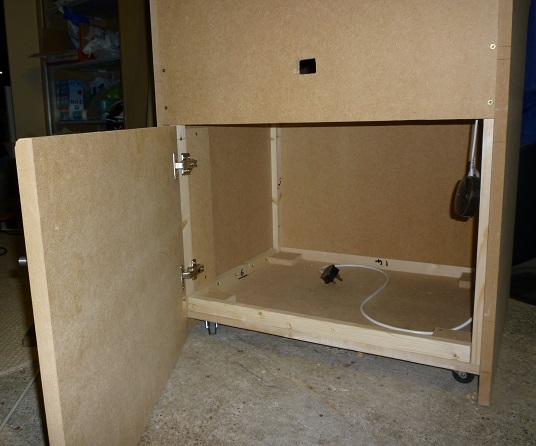 At the back of the cabinet I fitted the door with a tiny chrome handle. It doesn't quite fit properly (probably just bad placement of the top hinge) so I'll be needing the expert help of Harry to sort that out - though nobody will ever see it.
 For the control panel it didn't really fit to have a hinge so instead I opted to fit the wood below the control panel with dowels. So to access the control panel is a case of removing the drawer and pulling out the two wood panels giving loads of room to fit in. And if more space is required or the CP needs to be removed, it's fitted with angle brackets and will just pull straight out.
 In doing so I realised I'd have two cuts showing (as from previous days I fitted a drawer in the middle of the kick-pate. So I removed the drawer front and replaced it with a larger one to go all the way to the top. If I were doing it from scratch I'd have simply made the drawer to fit directly below. The pictures below show the progress. Note the retaining bar I think I'll keep it as it's stopping the middle section from splaying out given there is nothing permanently screwed there.
I also added the wood for the speakers. It looks large but the space for speakers is tiny because the wood for the marquee goes all the way across to the back to stop any light from escaping so I'll only be able to fit maybe 3-4 inches in there. Below you can see the new drawer and the speaker.


No comments:
Post a Comment